Microscopy and Plasmolysis
ABLE 2019
This version of our student labs has been modified for the 'Using Foldscopes™ for Offline Exploration in Online Biology Courses' major workshop at ABLE 2019. We have combined the Foldscope™ portions of two separate, sequential labs ('Microscopy' and 'Osmosis and Diffusion'), and omitted the other exercises. If you have attended the workshop and have already prepared and posted photos of your red onion specimen, take the following steps:
(1) Download the student questions document from the Handouts box in the sidebar, at left. [A hard copy was also provided during the workshop.]
(2) Skip to the Measuring What You See: Viewing Magnification, Field of View, and Specimen Size (p. 7) and Observing Plasmolysis (p. 19) pages of this lab.
If you would like us to include your ideas for using Foldscopes™ in the revised manuscript for this workshop, please fill out this form. Short- and long-form evaluations of the workshop itself should be completed during the conference, at the direction of the ABLE 2019 organizers.
The full set of learning objectives and required tools and equipment for both labs are provided here for context; those directly related to the Foldscope™ activities are highlighted.
In this lab, we'll work with two microscopes and some images to explore concepts in microscopy. Working with microscopes requires two sets of skills: (1) manipulating the instrument and specimens and (2) interpreting the resulting images. We'll do a bit of both!
After completing this activity and the relevant readings from the textbook (Reece et al., 2018; Chapter 6), you will be able to manipulate a virtual compound light microscope and interpret the resulting micrographs, as well as to interpret representative images produced by electron microscopes. Specifically, you will be able to:
1. Identify the structural components of a basic light microscope.
2. Describe the correct procedure for placing a slide on a light microscope stage, illuminating it appropriately, and bringing the specimen into focus.
3. Recognize and distinguish among images produced by a light microscope, a scanning electron microscope, and a transmission electron microscope.
4. Distinguish between viewing magnification and image magnification by working with images and answering questions that require you to apply your knowledge of these terms.
5. Use field of view, scale bars, and an ocular micrometer to estimate the actual size of a specimen or of specific features of a specimen.
6. From micrographs, identify cell structures and organelles by their appearance, relative size and position within the cell, and/or clues about function.
7. Assemble a portable microscope, collect and prepare specimens, and capture and share images of what you find.
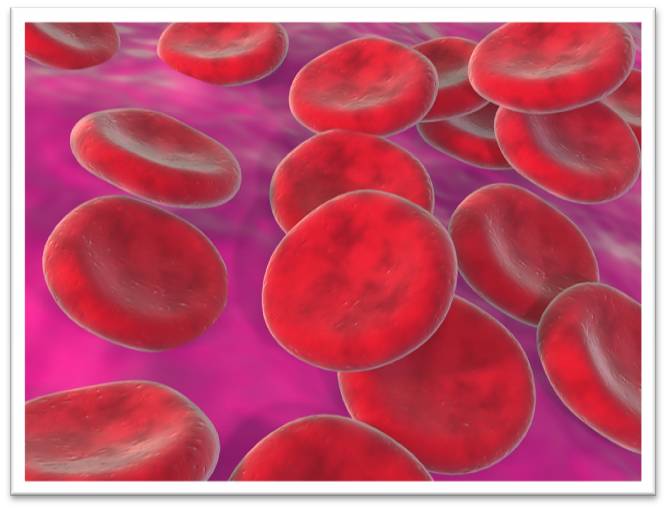
This lab entails studying well known exemplars -- mammalian red blood cells (RBCs), plant cells, and solutions of sodium chloride (NaCl) -- to better understand the processes and physiological significance of diffusion and osmosis. You will work with material that has already been prepared for you, as well as make your own direct microscopic observations with your foldscope.
After completing this activity and the relevant readings from the textbook (Reece et al, 2018; Chapter 7), you will be able to:
1. Define diffusion and osmosis and discuss the physiological significance of these processes at the level of the cell and of the whole organism.
2. Relate molarity to osmolarity and discuss the significance of these terms with respect to biological systems.
3. Define and state the difference between osmolarity and tonicity.
4. Interpret a line graph.
5. Compare and contrast the effects of osmosis on red blood cells and red onion cells, and relate your observations to the structural properties of these cells.
Notes
1Fiji is just ImageJ.
References
Reece JB, Urry LA, Cain ML, Wasserman SA, Minorsky PV, Jackson RB, Rawle F, Durnford D, Moyes C, Scott K, Walde S. 2018. Campbell Biology. Second Canadian Edition. Hoboken, NJ: Pearson Education Inc.
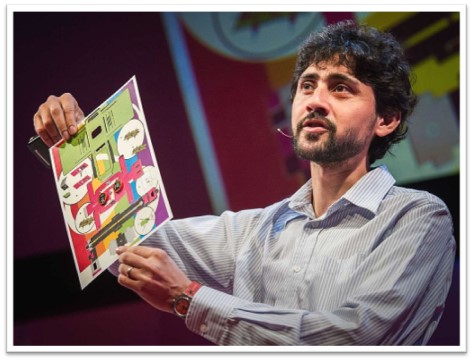
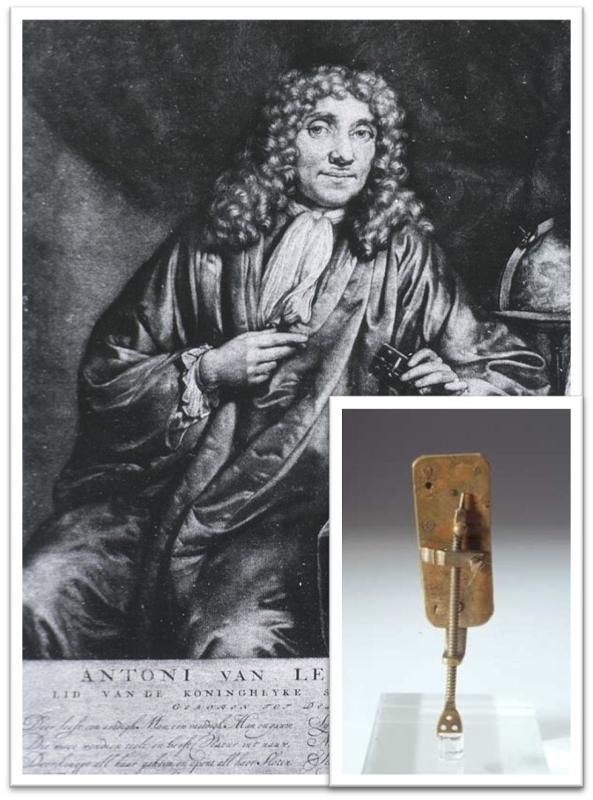
The foldscope, invented by Stanford University engineer Manu Prakash, is a contemporary version of the instrument perfected by Antonie van Leeuwenhoek in the late 17th century. Get ready to channel your inner Leeuwenhoek!
Your foldscope kit includes printed instructions for assembly, and there are also video tutorials posted at the Foldscope website.
Based on our experience with the foldscopes, we can also offer these tips:
Once you have your foldscope assembled, you're ready to start exploring! See the Finding Specimens for the Foldscope, Slide Preparation and Photo Tips and Sharing Your Discoveries pages of this lab for additional instructions.
|
Portable Microscopy Then and Now |
|
"Pencils are everywhere; so should be microscopes." - Manu Prakash (with a Foldscope prototype in 2012)
"Almost everything he saw, he was the first person ever to see." - Douglas Anderson (2014, p. 25)
|
Image Credits
Manu Prakash by https://www.ted.com [CC BY-SA 4.0], via Wikimedia Commons
Portrait of Antonie Van Leeuwenhoek, [Public Domain], via Wikimedia Commons
Van Leeuwenhoek microscope by Museum Boerhaave, Leiden (Museum Boerhaave, Leiden) [CC BY-SA 3.0], via Wikimedia Commons
Notes
*We suggest some other miscellaneous items that you may find useful on the Finding Specimens for the Foldscope page of this lab.
References
Anderson D. 2014. Still going strong: Leeuwenhoek at eighty. Antonie van Leeuwenhoek 106: 3-26.
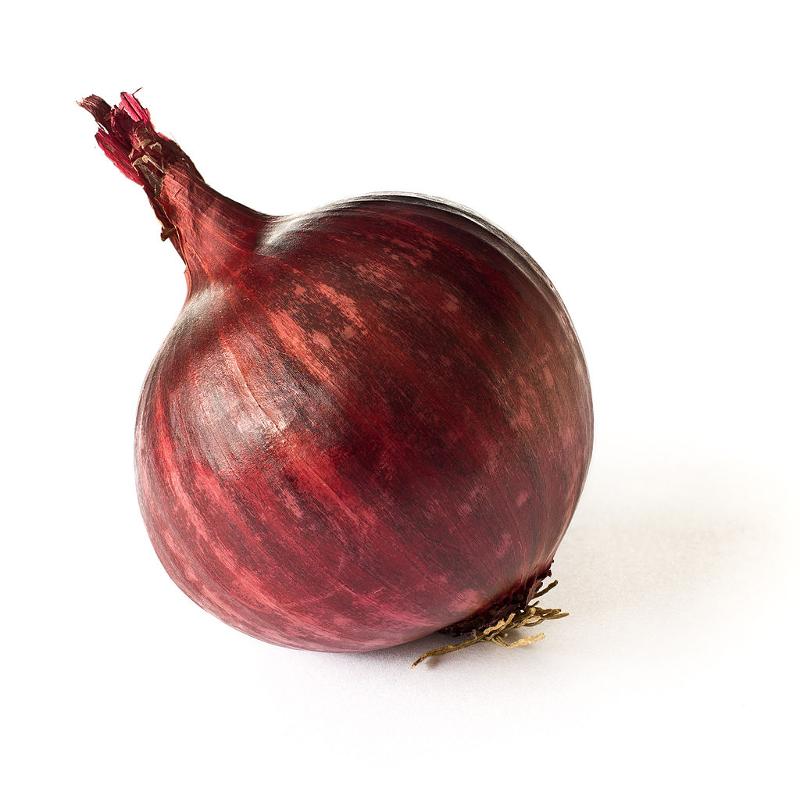
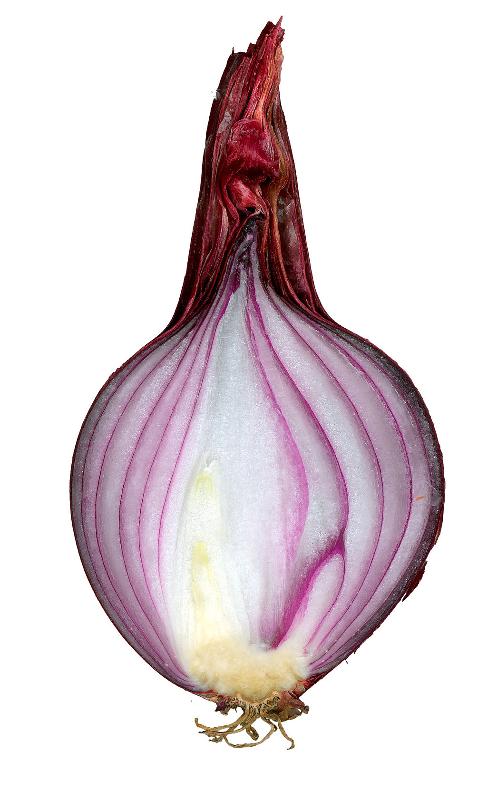
The only specimen you need for this lab is red onion (Allium cepa). Red onions contain anthocyanin pigments that make the cells easy to see - no staining required! Simply pull or scrape a tiny piece of the red membrane from any inner layer of the onion (not the dry, papery outer layer), and place it on your slide for viewing (see Slide Preparation and Photo Tips).
You may have a red onion at your home, or you can buy one at the grocery store if you want. Even a small piece of red onion that you may find in your salad* will have more than enough material for you to make your slide (as long as there is a red layer present).
|
Required Specimen: Red Onion |
|
Whole red onion.
Cut red onion, showing pigmented layers between the scales. |
You're free to explore as much as you like with your foldscope; some suggestions follow below. You will need to make more foldscope slides for another lab in this course, however, so keep that in mind and don't use up all of your slides. (You can make your own slides with heavier weight paper -- like greeting card paper -- and transparent tape if you need to.) If you decide to try other specimens, please heed the Notes of Caution section, below.
Additional Equipment
We provide you with a foldscope, transfer pipette, and a pair of gloves. You may also want to gather together the following items:
Algae and Plants
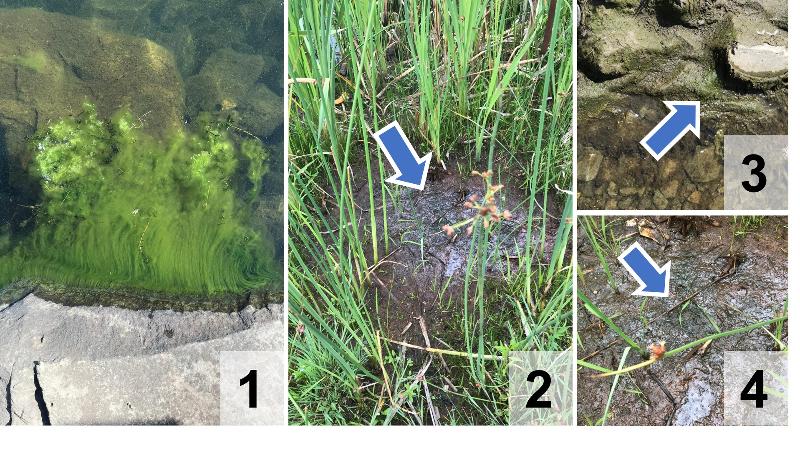
Filamentous green algae are good foldscope candidates because they are just a few cell layers thick (often only one or two). At your collecting site (see Collecting Tips: Locations, below), look for rocks or muddy patches with a greenish cast or film on the surface. In lakes, you may also see obvious clumps of filamentous algae that are either clinging to rocks or floating freely in the water (but see Notes of Caution, below). On shore, look for a green film on the surface of rocks. If you or someone you know has a fish tank, you might find some algae there.
Plant leaves may also work, but they must be very thin - if a specimen is more than a few cell layers thick, then it will be too thick for the cells to be visible. Choose leaves from plants that that are naturally very small (rather than using fragments of larger leaves), and look near the exterior margins of the leaf or near the veins, where the leaf tissue is typically thinner. Mosses and other ground-hugging weedy plants are good candidates, as are fish tank ornamentals such as Elodea.
If you collect a small amount of mud from a damp or marshy area, you have a good chance of finding motile organisms, even if you don't find algae. You may even want to try collecting a spoonful of soil in a glass jar, adding some water, and leaving it to sit in a sunny location. After a few days, you may have some algae growing in the jar! (If you try this, choose soil from a damp or shaded area with lots of plants growing).
Other Specimens to Try (Optional)
While collecting specimens for the foldscope is a low-risk activity, you are responsible for using common sense and due caution. You should be able to collect and prepare interesting specimens without entering bodies of water or using
potentially dangerous tools such as blades or scissors. Collect only in a location and manner that you judge to be safe, and do not risk injury or misadventure.
Please DO:
Please DO NOT:
On / Near Campus
Further Afield
Take a few photos of the site in general and the specific spot where you collect your specimen, safely collect the specimen, and make notes about the time, location, and weather conditions (see the assignment document attached to the dropbox for this lab).
If collecting wet or muddy specimens, nearly fill your specimen bottle with water from the site; then add your specimen. Or, bring some tap water with you, for algae that you may collect from relatively dry spots as well, such as the surface of rocks or soil. For sites on Halifax Harbour or the Northwest Arm, collect a small amount of water at the site. (This will be seawater; any specimens you collect that came from seawater should be stored in seawater, not fresh or tap water).
|
Optional Specimens |
|
Filamentous algae in various locations: attached to rocks in Lake Banook (1 and 3); on the surface of the mud near the shore of Maynard Lake (2 and 4 - look closely for the greenish film on the mud)
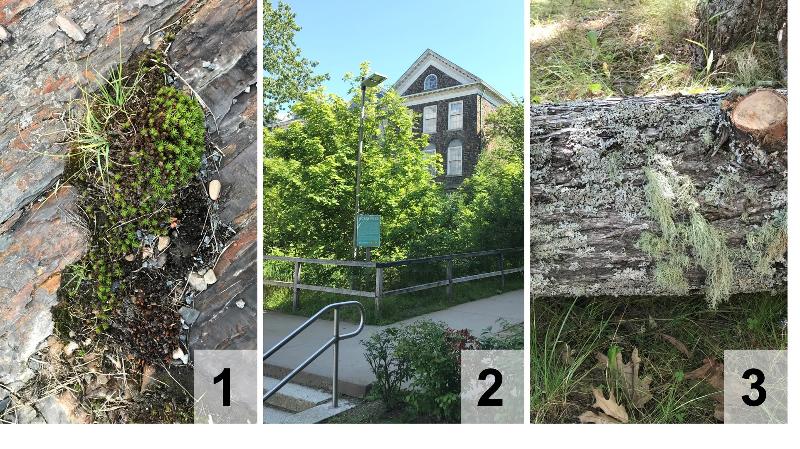
Locations around campus: (1) moss on a rock wall (2) Ocean Pond (3) lichen on a log behind Sheriff Hall (at the perimeter of the Dalhousie Outdoor Ecolab)
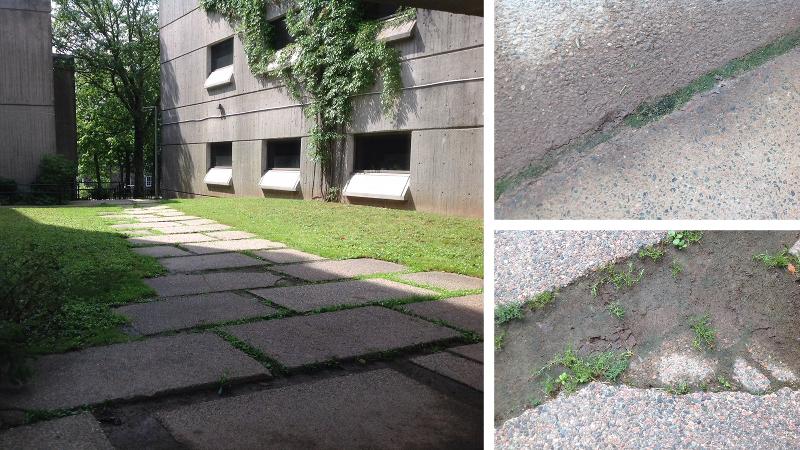
Locations around campus: the walkway behind the LSC, between the Psychology wing and Oceanoraphy (Sherriff Hall is in the distance, behind the trees; the Dalhousie Outdoor Ecolab is among the trees)
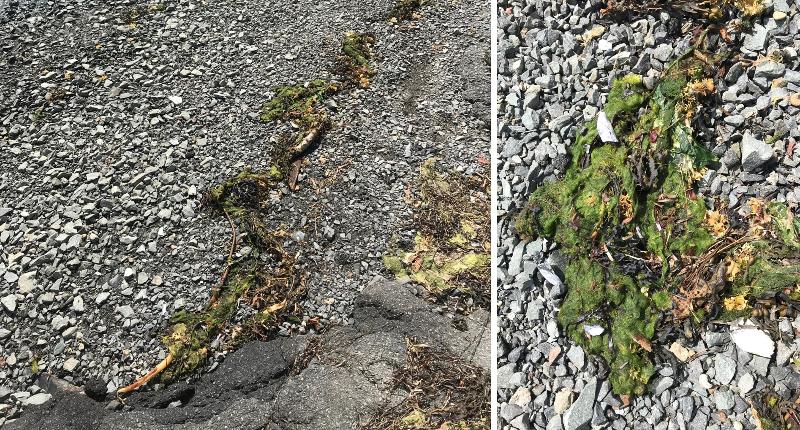
Drift algae on the beach at the end of South Street, on the Northwest Arm.
Grow your own algae in a jar - just add water!!
|
View the tutorials on this page (also posted at https://www.foldscope.com/tutorials/) for tips on preparing your slides and taking photos.
Getting a decent photo may require some improvisation - if your camera lens is raised, you may find that the ring sticker that is meant to attach the coupler to your phone doesn't work very well. You may have to use sticky tack or extra tape to hold the coupler in place, or borrow another phone or tablet with a 'flat' lens (i.e., one that is flush with the surface of the device) to take the photo.
|
Foldscope Tutorials |
|
Note that glass slides are not included in your kit; paper slides start at 1:27
|
Share a photo or video of your foldscope specimen by posting it to the appropriate Padlet gallery (morning session or afternoon session) below: double-click anywhere on the 'corkboard' or click on the pink circle in the lower right-hand corner of the screen. You will be prompted to add some text and upload your photo/video.
In the Title field, provide as much information as you know about the identity of the organism and the part of the organism pictured. Common names are fine, scientific names are great if you know them. If you don't know what your photo shows, use 'unidentified'.
In the Write something... field, include information about your collection site and who you are. See examples below.
You can also "like" and comment on your peers' posts.
Padlet gallery for ABLE 2019 workshop morning session:
Padlet gallery for ABLE 2019 workshop afternoon session:
|
Padlet Sample Post (Text Only) |
|
Title: red onion (Allium cepa)
OR (e.g., if you decide to post other specimens)
Title: black medic (Medicago lupulina) leaf Title: grass root Title: mushroom spore Title: unidentified plant leaf Title: unidentified alga(e) Title: unidentified protist Title: unidentified etc,
Write something...
Collection Site: where you collected your specimen (non-onion photos only) Date Collected: the date you collected the specimen (not the date you uploaded the photo) Submitted by: your full name (optional for ABLE 2019 workshop) |
Digital files include metadata with information like when and where a photo was taken, the type of camera used, etc. If you wish to do so, you have some ability to remove this information from your photos by adjusting the location/privacy/photo settings on your device before taking your photos, or after-the-fact by changing the photo file's properties. For more information, see Remove metadata from Office files, PDFs, and images*.
The Padlet gallery is intended to be a private board for members of the class to share their work and to comment on that of their peers. Please do not download, copy, share, or embed individual photos or the Padlet board in whole or in part to any external location without the written permission of the instructor and the student or students whose work you wish to copy/share. The Padlet gallery will be archived at the end of term.
If you would like to share your image with a larger audience, you might consider joining the Foldscope Microcosmos community, or creating an account with iNaturalist, which has a dedicated Foldscope community. The iNaturalist website / app can also help you with identification - when you upload a photo, it will make suggestions about the identity of your organism.
Creating accounts at these sites is entirely up to you; even if you choose not to, you can still see what others from around the world have discovered with their foldscopes!
*The 'Remove metadata... ' link is provided for information purposes only, and not as an endorsement of links and services mentioned in the article.
Omitted from the ABLE 2019 workshop: Students use the University of Delaware's Virtual Compound Microscope to learn about the structure of a basic light microscope, and practice working with virtual slides (positioning, focusing, and identifying cell structures).
Notes
The UD Virtual Compound Microscope was created by Robert Ketcham, Department of Biology, (rketcham@udel.edu) and Becky Kinney, Instructional Technology (bkinney@udel.edu), University of Delaware. Some rights reserved under a creative commons Attribution-NonCommercial-NoDerivs 2.5 Generic license.
Omitted from the ABLE 2019 workshop: Students are provided with instructional material about field of view diameter use the University of Delaware's Virtual Compound Microscope to estimate specimen size using field of view and to measure more accurately with an ocular micrometer.
They are also asked to use the field of view method to estimate the size of the cells in their red onion specimen (see student questions handout).
Omitted from the ABLE 2019 workshop: Students are provided with instructional material about image magnification and scale bars, for use in interpreting micrographs.
Omitted from the ABLE 2019 workshop: Students study and interpret light and electron micrographs.
Omitted from the ABLE 2019 workshop: Instructional material and practice questions about diffusion.
Omitted from the ABLE 2019 workshop: Instructional material and practice questions about molarity and osmolarity.
Omitted from the ABLE 2019 workshop: Instructional material and practice questions about osmolarity and tonicity.
Omitted from the ABLE 2019 workshop: Instructional material about the structure of red blood cells.
Omitted from the ABLE 2019 workshop: Instructional material and practice questions about the effects of osmosis on red blood cells.
Omitted from the ABLE 2019 workshop: Instructional material, practice questions, and data collection related to hemolysis and crenation in red blood cells exposed to different concentrations of NaCl.
Omitted from the ABLE 2019 workshop: Data collection and interpretation related to hemolysis in red blood cells.
Omitted from the ABLE 2019 workshop: Data collection related to crenation in red blood cells.
Omitted from the ABLE 2019 workshop: Data interpretation related to crenation in red blood cells.
For this part of the lab, you will use your foldscope to directly observe the effects of osmosis on plant cells -- specifically, the epidermal cells of red onion (Allium cepa).
For more information about the foldscope, please see the Assembling Your Foldscope, Slide Preparation and Photo Tips, and Sharing Your Discoveries pages of this lab.
If you have used up all or most of your slides, you can make more of your own with some heavier-weight paper and transparent tape. Try greeting cards or other similar material. The Dalhousie Bookstore or other stores that sell stationery might have something as well; if you can buy by the sheet, ask for "100 lb silk cover". The Dalhousie Print Centre, on the 2nd floor of the Life Sciences Centre (same level as the Tim Hortons), sells 100 lb silk cover for 14 cents per sheet.
The outside dimensions of the slides are 27 mm x 76 mm; you should probably make them 27 mm wide, but the length isn't quite as important. The dimensions of the rectangular "windows" are 8 mm x 16 mm. It's not crucial to stick to these dimensions exactly - you just don't want the window to be so large that it is "floppy" or bends too much.
|
Did You Know... |
For this demonstration, you will prepare three slides, each slide representing one treatment: (1) No Treatment, (2) Tap Water, and (3) Salt Water.
Follow the steps below.
1) Prepare the Tap Water and Salt Water treatments. Add 5 teaspoons of tap water to each of your two cups. (If you are using something other than a teaspoon, add 5 of whatever it is...). To one of the cups, add 1 teaspoon (or 1 measure of whatever you're using) of salt, and stir until the salt is completely dissolved (about 2 minutes). [NOTE: Prepared NaCl solution will be available on the benches for the ABLE 2019 workshop.]
2) Obtain your tissue sections. Remove the dry outer papery layer(s) from your red onion until you get to the purple epidermis underneath (the part that we eat!). Using a pair of tweezers or your fingernails, carve a small square into the surface of the onion and peel off the outermost layer (the purple epidermis). Do this several times so that you have a number of small tissue sections - you only need three, but it's good to prepare a few extras, just in case. The most important notes here are that (a) the thinner you can get your tissue layers, the nicer they will look under the foldscope, and (b) they should be small enough that you can comfortably mount them onto the foldscope slide.
3) Soak the tissues. Place one or more tissue pieces into each of the Tap Water and Salt Water treatment cups. Allow them to soak for 5 minutes. While these tissue samples are soaking, mount another one (the No Treatment sample) directly onto a foldscope slide.
4) Record your observations. Using your phone or other device, capture an image of your No Treatment tissue sample. Mount the Tap Water and Salt Water samples on their own (separate) slides, and capture images of them as well. It is okay to use the optical zoom on your device if doing so improves your image - your photo does not need to include the entire field of view.
5) Share your observations. Post your best image from each of the three treatments to the appropriate Padlet gallery (Morning Session or Afternoon Session, or via the Sharing Your Discoveries page of this lab). Upon opening the gallery, double-click anywhere on the 'corkboard' or click on the pink circle in the lower right-hand corner of the screen. You will be prompted to add some text and upload your photo/video. Fill out the text fields as shown in the example on this page, substituting the treatment as appropriate, and your own name [optional for ABLE 2019 workshop].
|
Posting Your Images to Padlet |
|
|
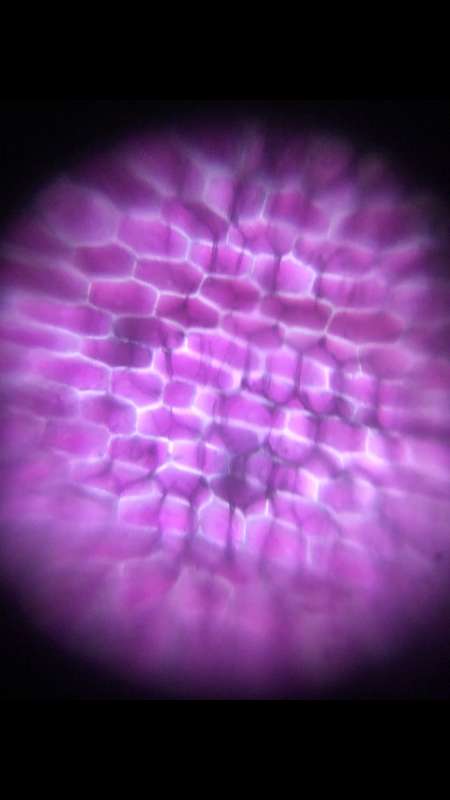
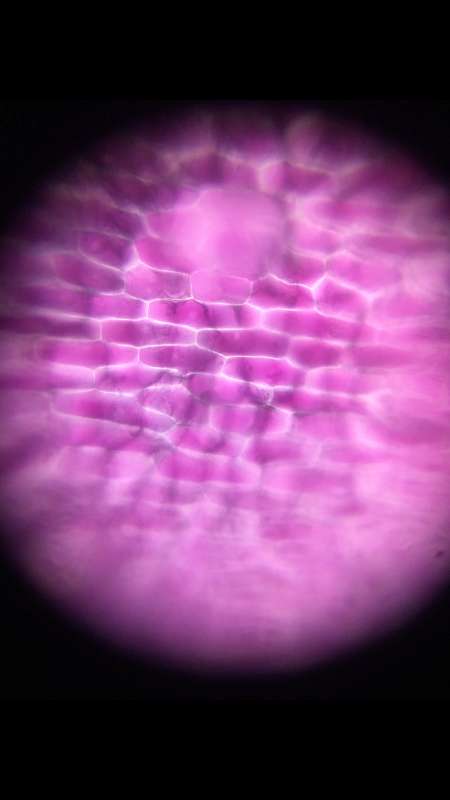
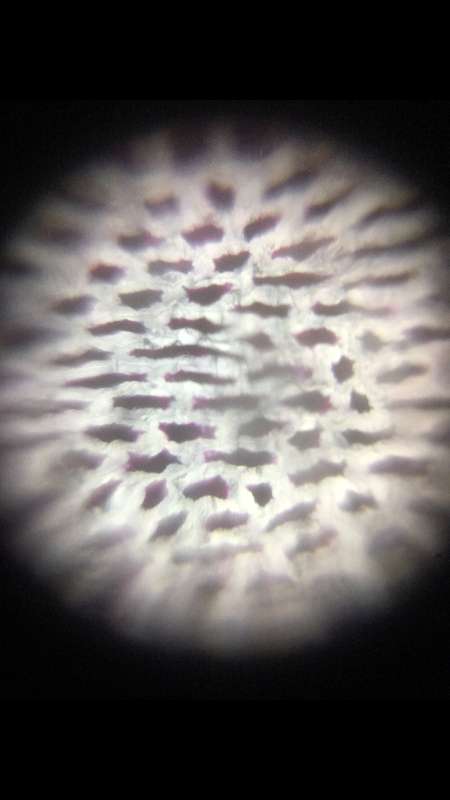
Finally, answer the questions for this part of the lab in your lab assignment document. If your own foldscope images are unsatisfactory, you can use the ones below to help you with the questions:
|
|
|
Red onion (Allium cepa) whole mount, untreated. |
|
|
|
Red onion (Allium cepa) whole mount, following immersion in tap water for five minutes. |
|
|
|
Red onion (Allium cepa) whole mount, following immersion in salt water of unknown concentration for five minutes. |
Image Credits
All photos on this page by Jacob Fletcher.