
Downloading, Installing, and Testing Fiji/ImageJ
You will need Fiji/ImageJ for the second part of this lab, in which you will collect data from images. If you have taken BIOL 1010, BIOL 1011, or BIOL 1020 you may have used this program and have it installed on your computer already. If not, go to https://imagej.net/Fiji/Downloads to download and install the version of the program that is right for your computer.
These instructions should work for Fiji and older installations of ImageJ:
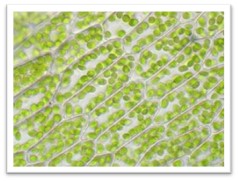
1. Click on this thumbnail to open a larger version of the photo. Right-click on the full-size version and save a copy of it to your computer.
2. Start the Fiji/ImageJ program; a small dialog box will appear on your screen (upper right in the screen capture below). Use File --> Open... to open the photo you saved in the previous step.
3. On the Fiji/ImageJ icon ribbon, click on the Point Tool icon. If it is set to 'Point' (a single square with cross-hatches), right-click on the icon to set it to 'Multi-point' (several hatched squares). The Point Tool dialog box may appear; if it doesn't, double-click on the Point Tool icon. Keep the default settings; deselect Label points and Show on all slices.
4. Move your mouse over to the photo and start clicking on individual chloroplasts. All you have to do is click; a running tally will appear below the Counter drop-down menu. Click on as many chloroplasts as you wish to confirm that this function is working properly. If it is, you are ready to proceed with the next part of the lab (beginning on the Chloroplast Density page) at any time.
Fiji/ImageJ Point Tool
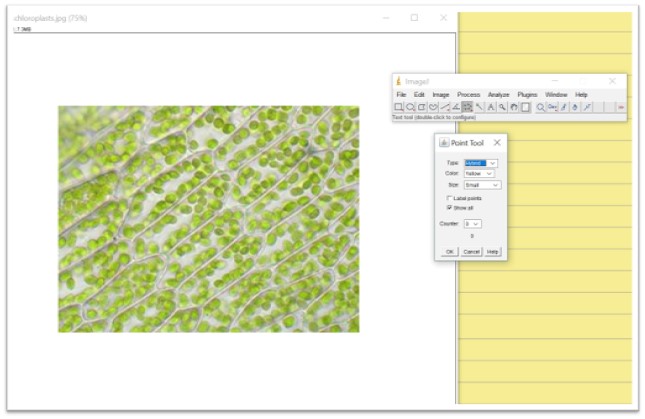
Screen capture showing the Point/Multi-Point Tool in ImageJ.
Image Credits
moss leaf cells Funsci.com. (2018). 3 - Lower Plants. [online] Available at: http://www.funsci.com/fun3_en/guide/guide3/micro3_en.htm#3.1 [Accessed 5 Sep. 2018]
ImageJ screen capture by Jennifer Van Dommelen